

How to Paint a Water Lily in Watercolor
Water lilies are beautiful subjects for watercolor. Their delicate petals, soft reflections, and the surrounding blues and greens of the water are perfectly suited to transparent washes and gentle color transitions. At the same time, they can be surprisingly challenging to paint because of the many overlapping petals and the contrast between the detailed flower and its much softer surroundings.
In this painting, I approached the subject by working from large shapes toward smaller details. The background and reflections were established first, while the flower was carefully protected, and the petals were then developed gradually with transparent layers of pinks and violets. This allowed me to preserve the luminosity of the flower while building enough contrast to make it stand out against the water.
In this water lily watercolor tutorial article, I’ll share some of the main ideas behind the painting—from planning the flower and using masking fluid to creating soft water, reflections, and delicate layered petals.
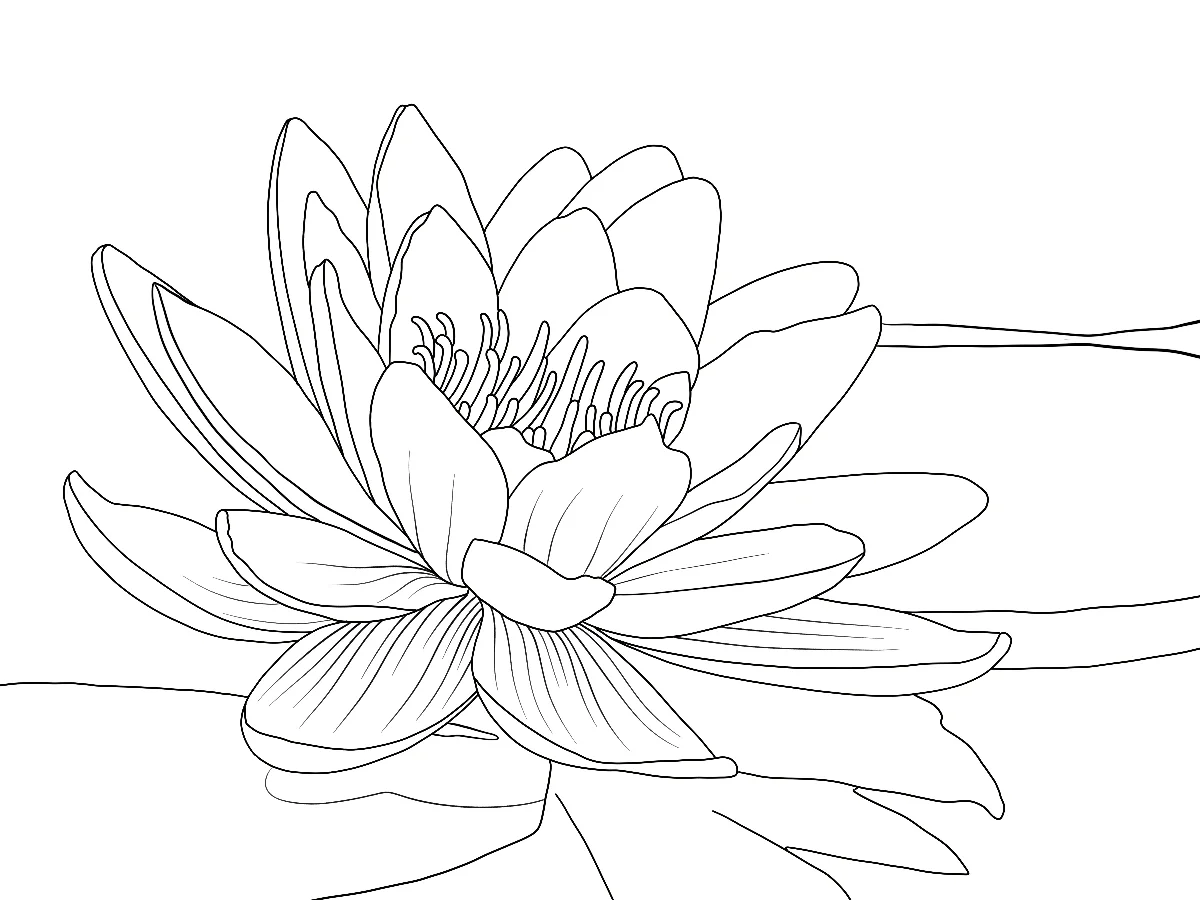
Planning a Complex Water Lily Drawing
A water lily can look quite complicated at first because so many petals overlap and point in different directions. Before thinking about color, it helps to establish a clear drawing that shows how those shapes relate to one another.
Instead of seeing the flower as dozens of separate petals, try to look for larger groups. Some petals spread outward across the surface of the water, while others rise more vertically around the center. Paying attention to these overlaps is especially important because they will later help us create the illusion of depth.
The drawing doesn’t need to contain every tiny detail, but it should give you enough information to understand where one petal ends and another begins once you start painting. With a complex flower like this, a little careful planning at the beginning makes the watercolor stage much easier.
Using Masking Fluid to Protect the Water Lily
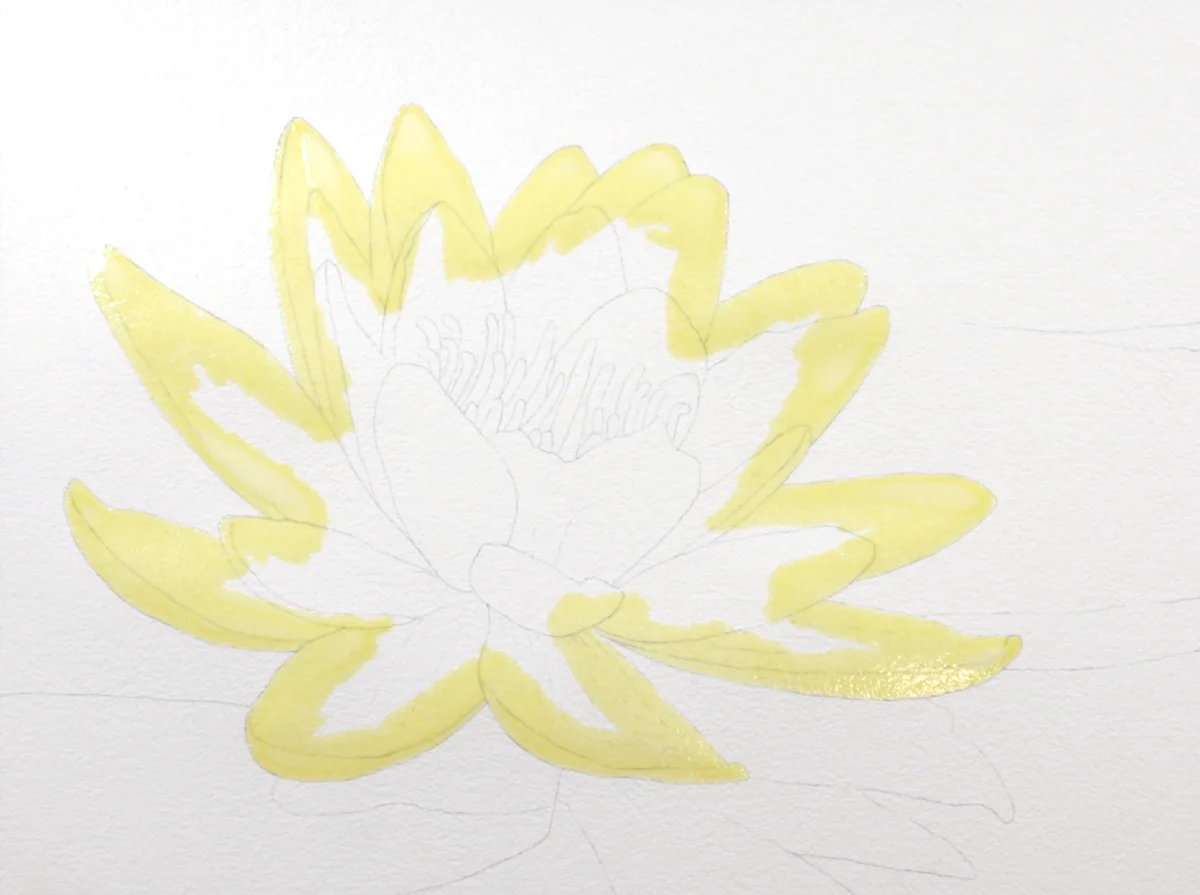
Masking fluid is especially helpful in a painting like this because it allows us to work much more freely on the surrounding water while keeping important areas of the flower protected.
I applied masking fluid to selected parts of the water lily rather than simply covering the entire flower. This allowed me to preserve clean areas of paper while still leaving some shapes available for the first washes. Once the masking fluid was dry, I could concentrate on painting the background without having to carefully work around every individual petal.
This is one of the ways I find masking fluid most useful in watercolor. It isn’t only for preserving tiny highlights—it can temporarily simplify a complicated subject and give you more freedom to use loose, wet washes around it.
Painting a Soft Water Background
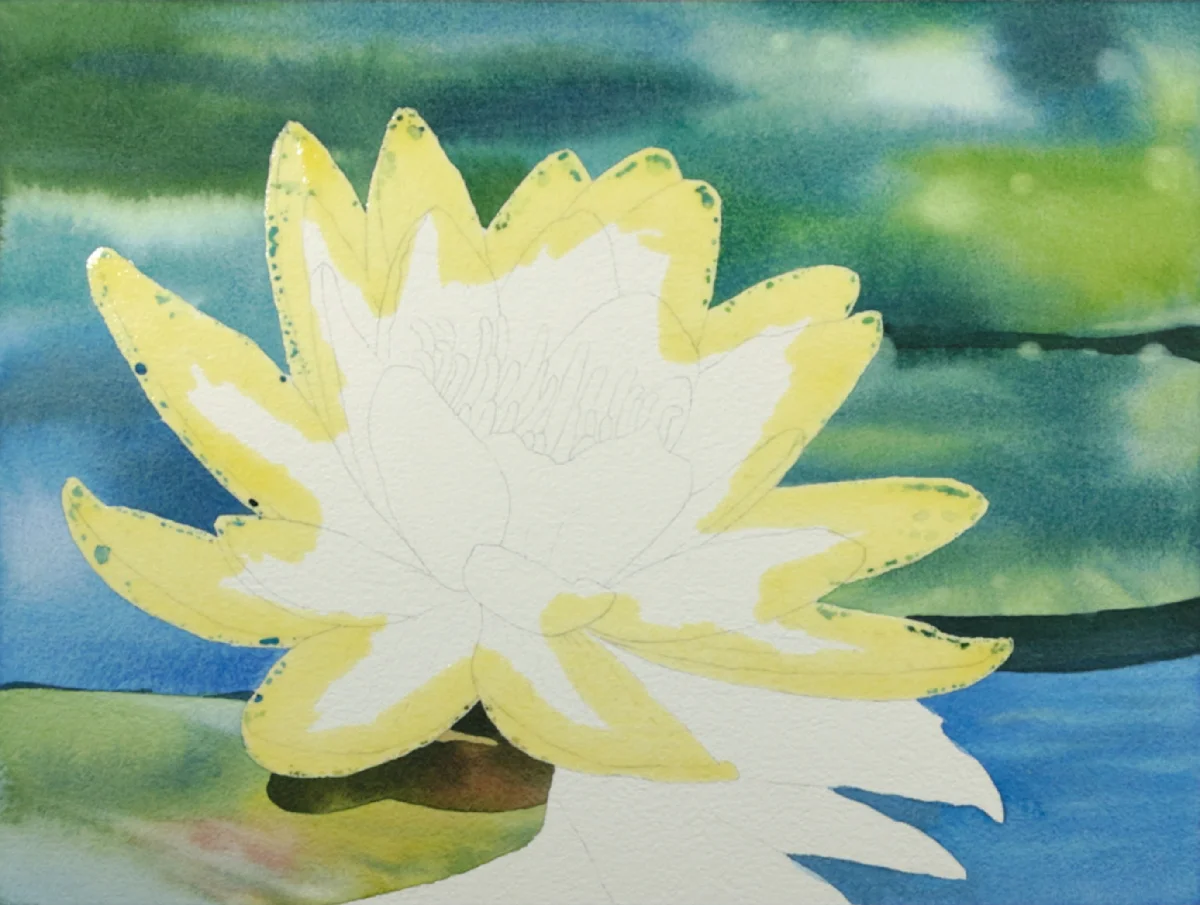
With the important areas of the flower protected, I could turn my attention to the water. Instead of trying to paint every reflection and every shape literally, I treated the background as a collection of larger areas of color and value.
Blues and greens flow into one another to suggest water and distant lily pads. Some transitions remain very soft, while a few darker horizontal shapes provide structure. This combination of soft and more defined edges helps create the impression of water without describing every detail.
When painting a background like this, try to resist the temptation to keep adjusting every wash. Allowing colors to mingle and settle naturally on the paper can create variations that are much more convincing than carefully painting each one. The softer background will also provide an important contrast to the more detailed water lily later.
Building the Water Lily Reflection
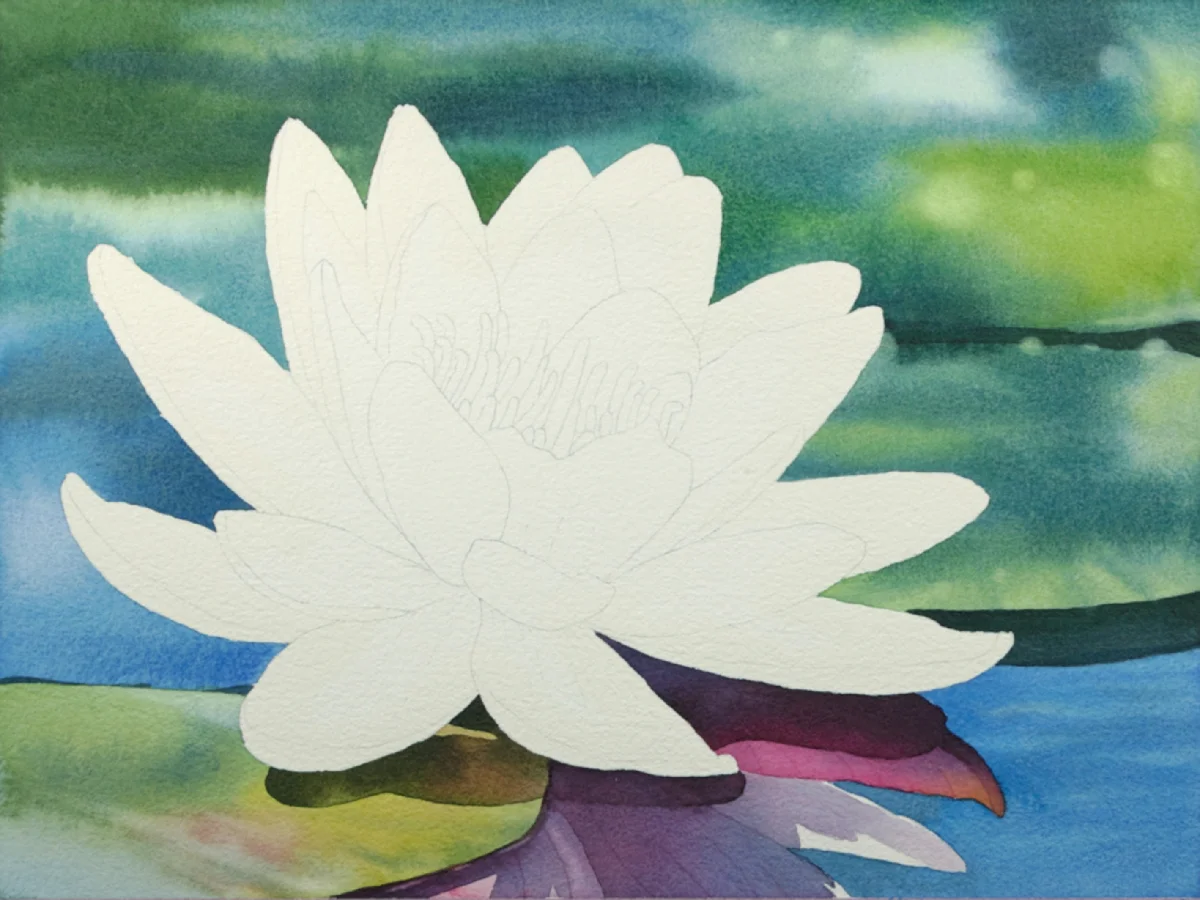
The reflection beneath the flower plays an important role in making the water lily feel as though it is truly resting on the surface of the pond. Rather than treating the reflection as a precise copy of the flower, I think of it as a collection of simplified shapes and colors.
Reflections on water are naturally distorted, so there is no need to reproduce every petal perfectly. Instead, look for the larger shapes, shifts in value, and changes in color. Keeping some edges soft while allowing others to remain more defined helps suggest the subtle movement of water.
Notice also how much darker the reflection becomes in places. These deeper values create contrast beneath the pale flower and help give the painting a stronger sense of depth.
Painting Delicate Water Lily Petals
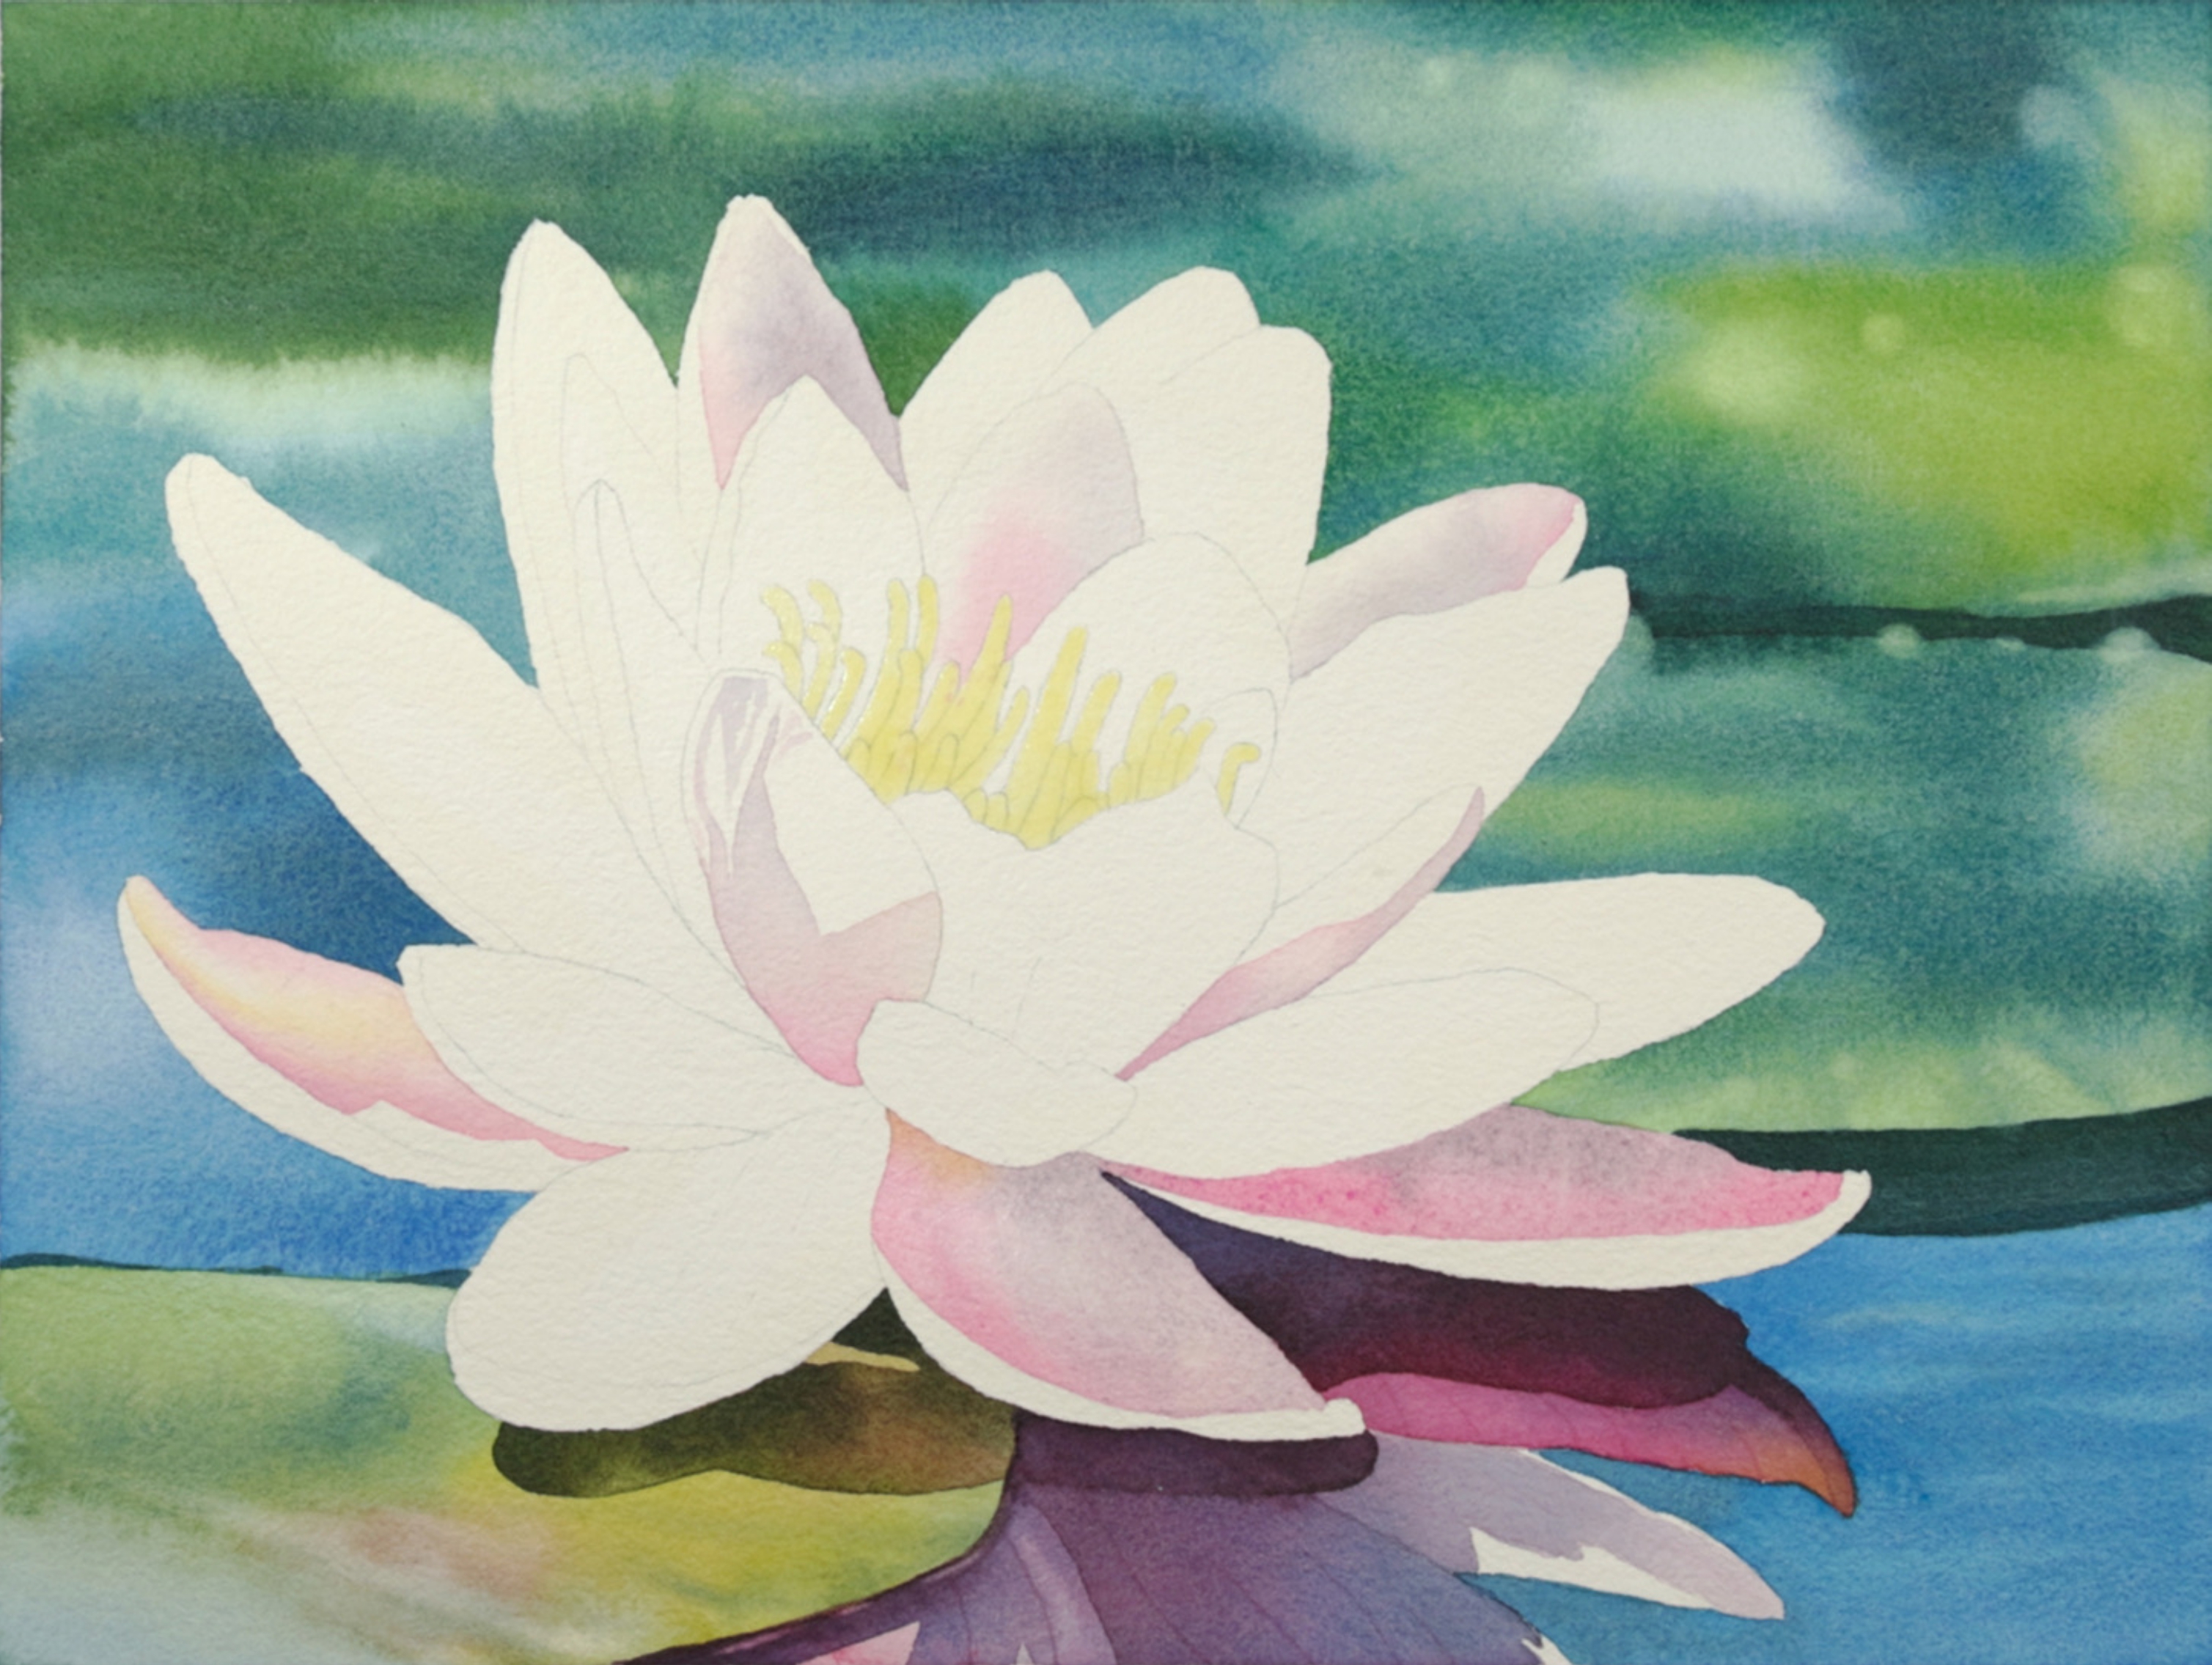
With the surrounding water and reflection established, the focus can shift to the flower. Pale petals can be surprisingly challenging in watercolor because their form has to be created without simply filling them with color.
Instead, I build the petals gradually with very light washes of pink, violet, and other subtle tones. Much of the white paper remains visible and becomes the lightest part of the flower. The color is concentrated where petals overlap, curve away from the light, or disappear behind neighboring petals.
This is where restraint becomes especially important. A few carefully placed shadows can describe the form of a petal more effectively than covering the entire shape with paint. By slowly increasing the values, the individual petals begin to separate while the flower still retains its luminous, delicate appearance.
Building Depth with Transparent Layers
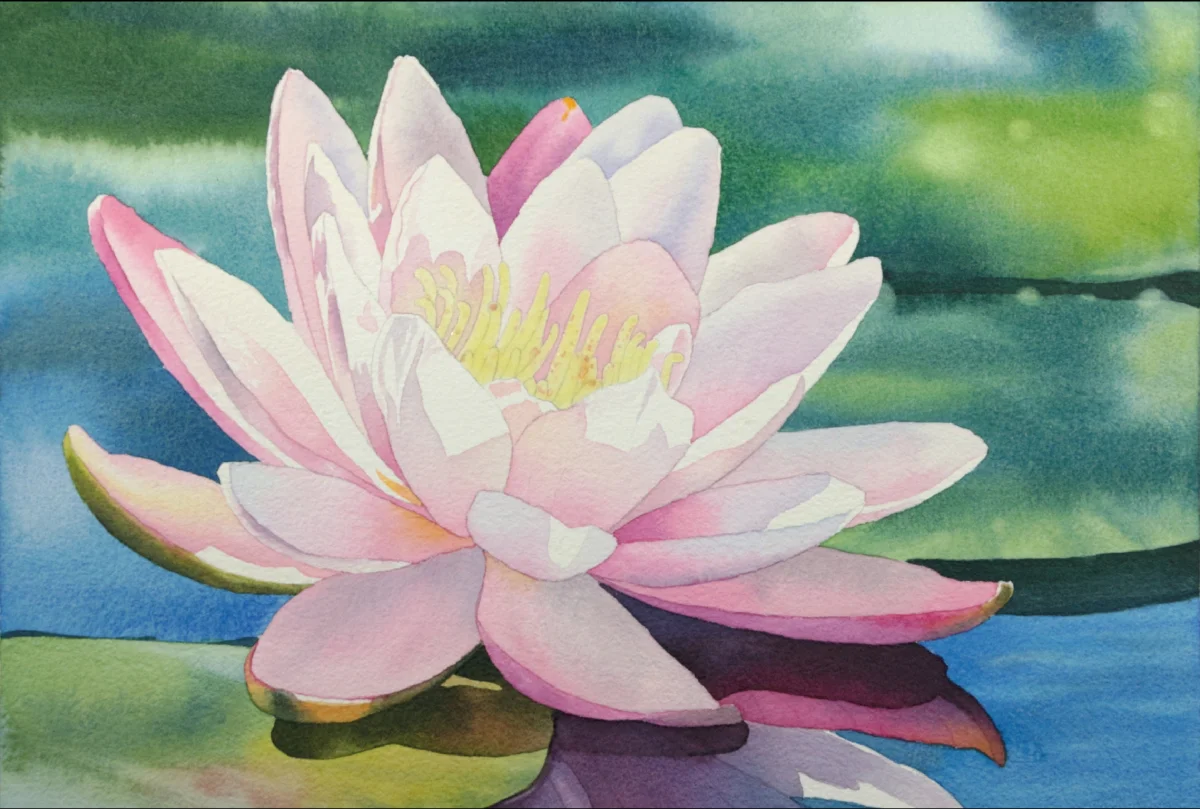
Once the first pale washes are dry, the flower can be developed gradually with additional transparent layers. Rather than trying to reach the final value immediately, I deepen selected areas little by little, always allowing the previous layers to remain visible underneath.
The darkest values tend to appear where petals overlap, near their bases, and in the deeper spaces around the center of the flower. These small areas of stronger contrast are what begin to separate the petals and give the water lily its three-dimensional form.
It is important to keep comparing these darker passages with the lightest petals. If every petal receives the same amount of color, the flower can quickly lose its luminosity. Preserving those differences in value is what allows some petals to catch the light while others appear to turn inward or sit behind them.
Adding the Final Details
As the painting approaches completion, the changes become smaller but increasingly important. This is the stage when I refine selected edges, strengthen a few of the deepest shadows, and add definition around the center of the flower.
I don’t try to sharpen everything. Some petals benefit from crisp edges and stronger contrast, while others can remain softer and less defined. That variation helps keep the flower natural and prevents it from looking as though every petal has been outlined.
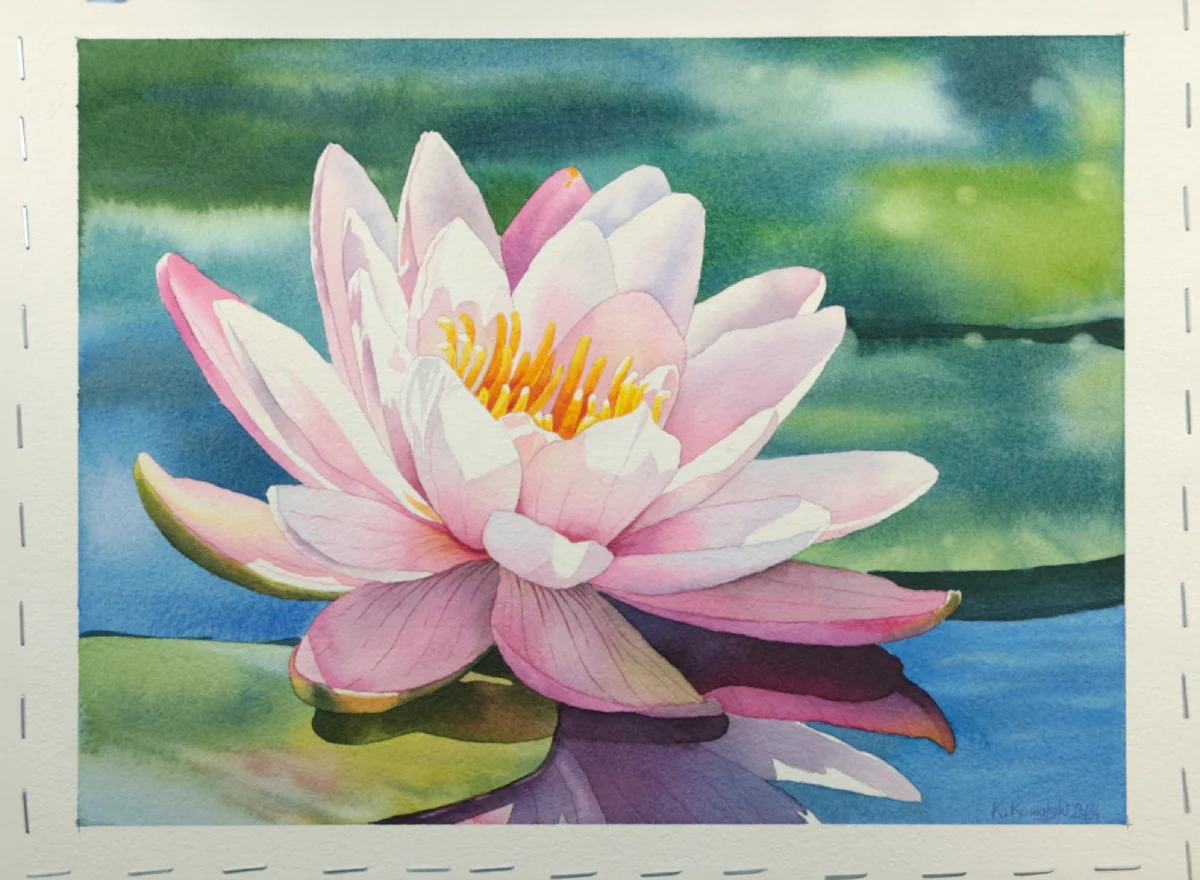
The final adjustments are also a good opportunity to step back and look at the painting as a whole. Rather than asking where more detail can be added, I look for the few places where additional contrast or definition will make the biggest difference. Knowing when to stop is just as important as knowing what to add.
What Makes a Water Lily Work in Watercolor?
A convincing water lily painting is not really about painting every petal, reflection, or ripple in perfect detail. Much of the effect comes from the relationships between soft and hard edges, light and dark values, and detailed and simplified areas.
Keeping the surrounding water relatively loose allows the flower to become the natural focal point. Preserving plenty of light within the petals gives them luminosity, while carefully placed darker values create the depth needed to separate overlapping forms.
Perhaps most importantly, watercolor works beautifully for this subject when we allow it to behave like watercolor. Soft transitions, transparent layers, unexpected mingling of colors, and slightly irregular edges all contribute to the atmosphere of the finished painting.
Watch a Preview of the Full Water Lily Tutorial
If you’d like to see the complete painting process, the full Water Lily tutorial is available in my Online Watercolor School. In the class, I guide you through the painting from beginning to end, showing each stage in detail and explaining the decisions I make along the way.
Paint the Water Lily Step by Step
Ready to paint the complete Water Lily with me? The full step-by-step tutorial is available in my Online Watercolor School, where we’ll work through the entire painting together—from preparing the drawing and protecting the flower to developing the water, reflections, delicate petals, and final details.
As a School member, you’ll also have access to the reference photo, line drawing, and other downloadable resources provided with the tutorial.


